Installation Guide
The OpenStick S1 kit is Socolode's complete light painting system: a Beetle S1 controller paired with a spliceable LED light stick. This guide takes you from unboxing to your first light painting — assemble the stick, install the Socolode phone app (recommended), and play your first image.
- Charge the controller with a 5V/2A (or higher) USB-C charger until the charging indicator turns off.
- Ports, charging, and buttons are covered in Basic Operations.
- Have an Android 7.0+ phone ready if you want to use the Socolode app.
Installation Steps
1. Assemble the Light Stick
Installation steps (splice board kit):
2. Install the Socolode Phone App (Recommended)
The kit works on its own, but the Socolode app makes it much easier to get creative: adjust colors and effects, play images, try music-reactive modes, and turn photos into light painting materials. It connects directly to the controller's Wi-Fi hotspot — no account, no cloud, and no internet needed after installation.
Socolode App
Connect your phone to the light stick to control colors, play light paintings, and create materials in one app.
- Direct LED control & effects
- Music-reactive modes
- Light painting playback & material maker
Connect the app to your kit
- Power on the controller and open the APP app on its home screen (it turns on the device's Wi-Fi hotspot). The screen shows the hotspot name once it is ready.
- Open the Socolode app and choose your device model (Beetle-S1).
- Tap Connect and allow the Wi-Fi prompt. If Android says the network has no internet, choose Keep connection.
- Once connected, the LED, music-reactive, light painting, and material modules are ready to use.
The iOS app is still in preparation. Every on-device feature works without a phone; to upload materials, use the hotspot upload steps in Material Download.
3. Enter the Light Painting Stick App on the Device
If the APP app is open, long-press the center key to return to the home screen.
Select App
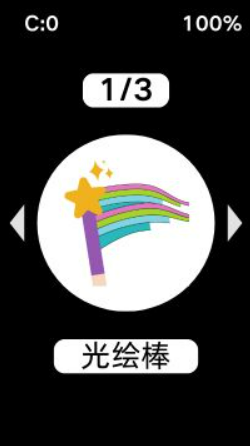
Light Painting Stick
- Select App: Toggle the joystick button "Left/Right" to select "Light Painting Stick App"
- Enter App: Press the "Center" button to enter the light painting stick app
4. UI Introduction
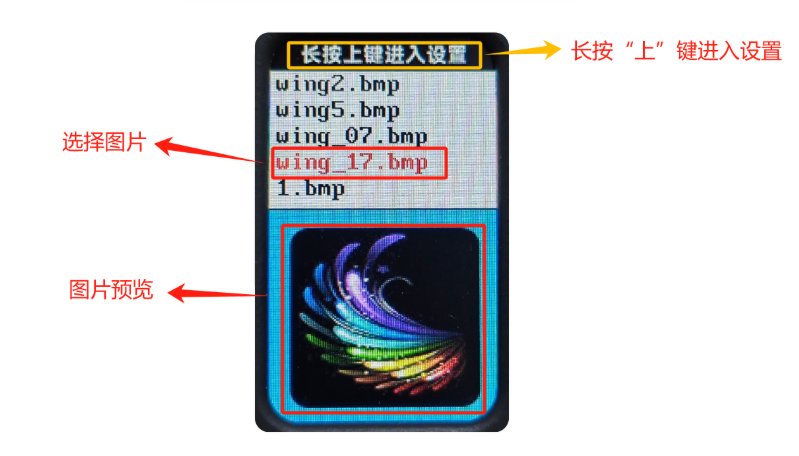
- Image Selection: Toggle the joystick "Up/Down" button to select images.
- Image Preview: The image being previewed.
- Enter Settings: Long press the "Up" button to enter settings and adjust parameters.
- Play: After selecting an image, click the "Center" button to start playback.
5. Play Images
- Play: Select the image you want to play, click the "Center" button to enter playback mode. The screen will show the playback progress percentage.
- Pause: During playback, continue clicking the "Center" button to pause playback. The light painting stick's lighting will stay in the paused state.
- Resume: Click the "Center" button again to continue playing the remaining part of the image.
- Stop: Click the "Down" button to stop and exit the current playback.
6. Enter Settings
On the settings screen, use Up/Down to select an option, Left/Right to adjust it, and the Center key to return to the image list. Changes are saved automatically.
- Brightness: playback brightness, 1%–100% (default 50%). Higher values make the light painting brighter.
- Speed: playback speed, 1%–100% (default 50%). Higher values play faster.
- Sync: On/Off. When on, pressing Play on one wand also starts the other wands that have Sync enabled, so multiple sticks can play the same image together for large-area light painting. Sync increases power consumption — turn it off when not needed.
- Countdown: 0–1000 s. Sets how long playback waits after you press Play. Hold Left/Right to change the value quickly.
- Loop: On/Off. When on, the current image restarts automatically after it finishes — handy for shooting several photos or a long display.
- Fill light brightness: 1–10. Hold the function key and the stick lights up white while the screen dims. Use it to illuminate objects or people that should appear in the light painting — it works like a flash or fill light. This option sets the brightness of that white light.
- Reverse: On/Off. Plays the image from its last row back to the first, reversing the direction of the light painting pattern.
7. Add Your Own Images
Once you have played your first image, you can load your own artwork:
- Create the material with the Material Creation tutorial — export the main image as BMP and a 100×100 JPG preview.
- Send it to the device using Material Download — either over the Wi-Fi hotspot or with a USB cable.
- Or do it all on your phone: the Socolode app's material creator can convert a photo and send it to the device directly.
8. Exit the Light Painting Stick App
- Exit Light Painting Stick App: It's simple - at any time, long press the "Center" button to exit!
Next Steps
- Ready to shoot? Follow the 5-Minute Light Painting Tutorial.
- Check the Light Painting FAQ for common questions.
- Still stuck? Visit Community & Contact — happy to help!