Take Your First Light Painting Photo in 5 Minutes
No professional equipment needed, no experience required — take magical light painting photos with just your phone
This is the official Socolode beginner guide to light painting. You'll learn how to capture your first light painting photo in 5 minutes using the simplest setup — a phone and a light source.
🎬 Video Tutorial
Watch the 3-minute official video tutorial first — you'll master it after one try:
📸 What you'll achieve
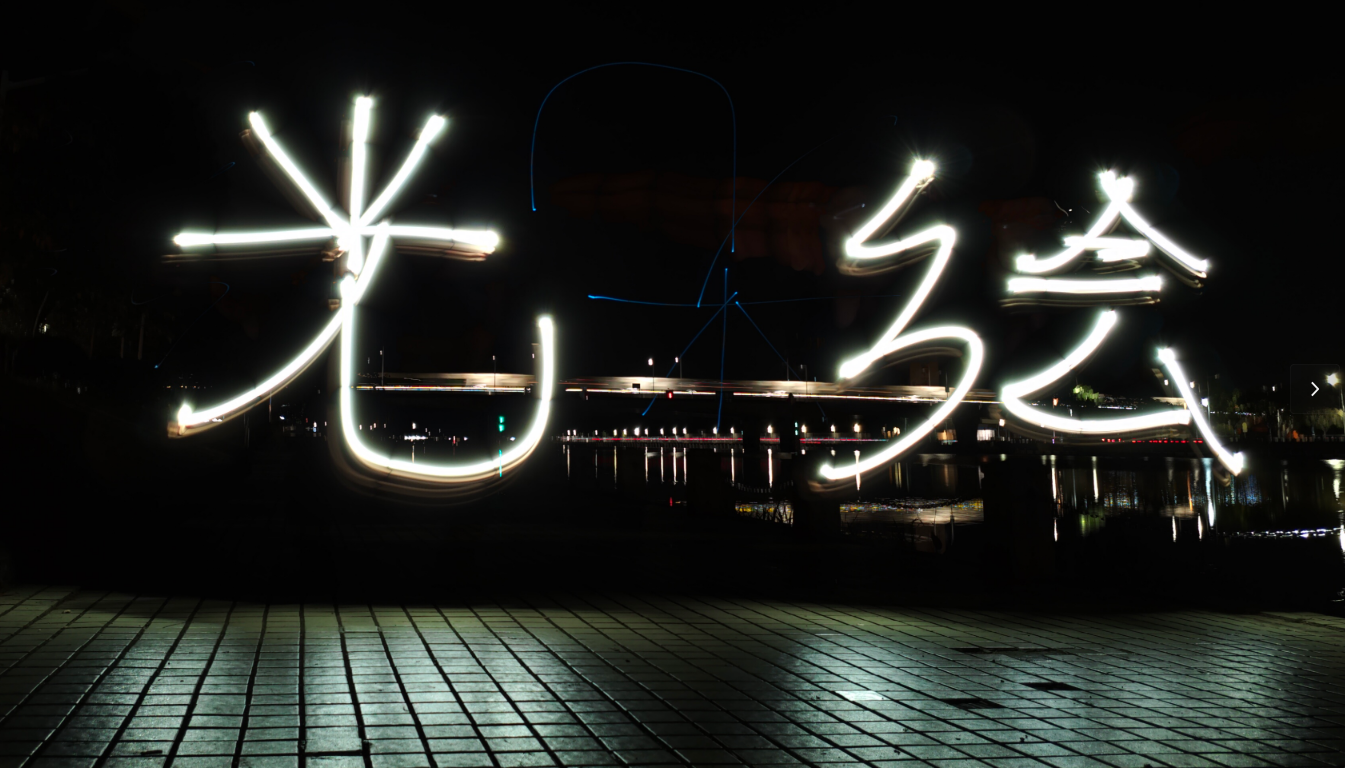
Light painting artwork created with a phone flashlight
No professional camera needed, no expensive gear — the phone in your pocket is all you need.
🧰 What you need
Just 3 things, all of which you probably already have at home:
- Something that glows: The simplest option is another phone's flashlight, or a flashlight, glow stick, night light — anything that emits light can be your "light pen"
- A phone to take the photo: Both iPhone and Android work
- Something to stabilize your phone: A tripod is best, but you can also prop your phone against a wall, on a table, or hold it in place with anything heavy — the key is the phone must not move during the shot
Find the darkest possible environment! A room with lights off at night, a dark corner of your neighborhood, or an open space without street lamps. The darker it is, the clearer and brighter your light painting will be.
🚶 Step 1: Prepare your light source
- No parameters to adjust — just make sure it's bright
⚙️ Step 2: Camera phone settings (most critical)
This is the key step — get these right and you'll succeed on the first try:
iPhone
- Open the Camera app, swipe left to find Night mode (supported on iPhone 11 and later)
- Turn off the flash
- Stabilize your phone and aim the lens at the position where you'll stand
Android
- Open the Camera app, tap "More", find "Light Trail" or "Light Painting" mode (90% of Android phones have this built-in)
- If you can't find light painting mode, switch to Pro Mode:
- Shutter speed (S value): set to 15 seconds
- ISO: set to 100 (lower is clearer, less noise)
- Turn off the flash
- Stabilize your phone and aim at the shooting position
The phone wasn't stabilized! Holding the phone in your hand will always result in blurry photos. Make sure your phone is on a stable surface and do NOT touch it during shooting.
🎬 Step 3: Start shooting
- Stand in front of the camera phone, about 2-3 meters away
- Hold your light source facing directly at the camera lens
- Press the shutter button (on Android light painting mode, tap Start)
- After pressing the shutter, slowly move your light source from left to right at a steady pace, drawing hearts, names, or simple patterns
- When done, tap Stop — your photo is ready!
✨ Final step: Quick color grading (optional)
A few simple adjustments in your phone's photo gallery will instantly improve the result by nx:
- Brightness: Lower it slightly to make the background darker
- Saturation: Increase it slightly to make the light colors more vivid
- Contrast: Increase it slightly to make the light tracks clearer
❌ Common issues on your first try
| Problem | Cause | Solution |
|---|---|---|
| Photo all black / very dark | shutter too short | set shutter longer |
| Photo all white / overexposed | ISO too high / other lights in environment | Set ISO to 100, turn off surrounding lights |
| Light tracks are blurry | Phone moved / moving too fast | Stabilize the phone, move the light source slower and at a steady pace |
| Only a single dot, no track | Light source not facing lens / moving too fast | Face the light source directly at the lens, move slower |
| Person in photo is blurry | Body moved during shot | Keep your body still while drawing, only move your hand holding the light source |
🎉 Next steps
Congratulations on mastering the basics of light painting! Next: